
What a formation is
When you tap a friendly army you open its panel: the troop members inside it, their health, location, weapon information and the orders it can take. That stack is a formation. It moves as one, and when you assign a commander, the commander applies to the entire formation, not to a single member.
Formations can contain several troops. Ground troops and tanks share roads; aircraft and ships follow their own movement rules. Keep compatible units together and you get one strong, readable army instead of a cluster of loose units.
Split and Add Army
Split separates selected living members into a new army. Use it to leave a garrison behind, detach a scout, or pull a wounded unit out of a fight. Add Army joins compatible friendly formations into one. Use it to concentrate force before a battle or a Rogue hunt.
- Split before moving a garrison, not after; an army already in transit is harder to manage.
- Consider merging before contact. Armies that arrive separately can be engaged separately.
- Check the panel after any split or merge to confirm which commander now leads which formation.
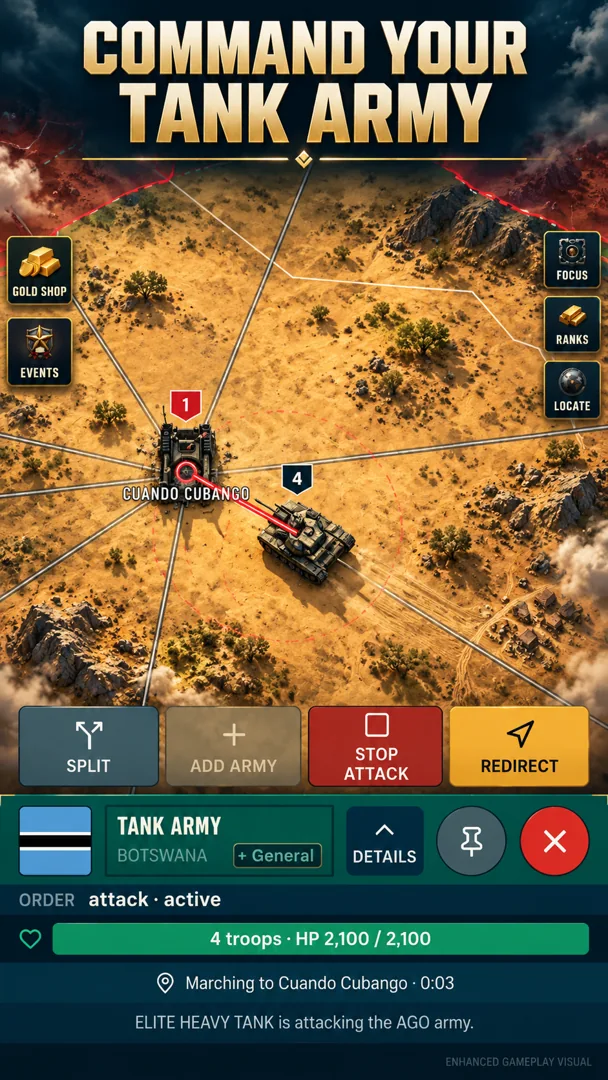
Enhanced gameplay visual — retouched, not a raw screenshot
Recruiting and assigning generals
Commanders, called generals in the assignment screens, are recruited into your country and then assigned to a formation from the army panel. A general brings bonuses that can affect an army in areas such as attack, damage and health. The exact values are shown on the general and can be reviewed before you assign.
Open the Commanders panel to see your roster. Mark favourites for quick selection, compare their abilities, then open an army and assign the general who suits what that army is about to do. A heavy assault force benefits from attack and damage; a garrison that must absorb pressure benefits from health.
Commander XP
Commander XP is the currency used to improve generals. It belongs to your campaign. Spending it uses only the campaign's available Commander XP; general XP earned in battle is tracked separately and stays unchanged.
If an XP request seems not to go through, refresh the roster to check your current XP balance first. If the request is still unconfirmed, use the Retry or confirmation the panel offers for that request rather than starting a fresh one, so the same spend is not submitted twice.
Where to invest
- Your main field army's general first. It fights most and benefits most.
- Then the general on the formation that guards your most valuable border.
- Leave scouts and garrisons for later; they rarely decide outcomes.
Formation doctrine
A few habits keep formations effective over a long campaign.
- One job per army. Assault, garrison, escort, scout. Mixed-purpose armies make poor decisions on every order.
- Generals follow the job. When an army changes role, reconsider its general.
- Size against the target. Read the opponent in live details, including Rogue formations, and bring enough to finish.
- Keep a reserve. One healthy formation near home answers surprises better than everything committed forward.
Pre-battle formation checklist
Run this before committing an army to any fight you care about.
- Merge compatible armies that will fight together.
- Split off damaged members you want to preserve.
- Confirm the assigned general suits the mission.
- Spend available Commander XP on the general who fights next.
- Read weapon information in the live unit details, not a remembered number.
Common formation mistakes
These are the errors that most often cost a battle that should have been won.
Common mistakes
- Arriving piecemeal without a plan. Separate arrivals can be engaged one at a time; coordinate or concentrate when the fight matters.
- Forgetting a general after a split. The new formation may have no commander.
- Spreading XP thinly. Concentrate on the general who fights most.
- Merging incompatible units. Ships and ground troops travel differently; build formations around movement type.
Scenario: one army, two threats
A typical mid-game dilemma, and how formations solve it.
Field scenario
An expedition into Contested Land without leaving home bare
Rogue formations live in Contested Land, so hunting them means an expedition. Split a strong detachment from your main army and leave a garrison inside your Fortress province at home. Assign a general with attack bonuses to the detachment, pick one of the nine bridges, and check the Rogue strength in live details before crossing. Commit only when the detachment can finish the whole formation. After the kill, claim the loot in Mail Events and bring the detachment back across the bridge to re-merge.
Continue the field manual
Next: Province capture and control · Back: Army movement and combat